Known issues
Use this page to identify and troubleshoot currently known issues with your Olares One device. We regularly update this list with temporary workarounds and permanent fixes as they become available.
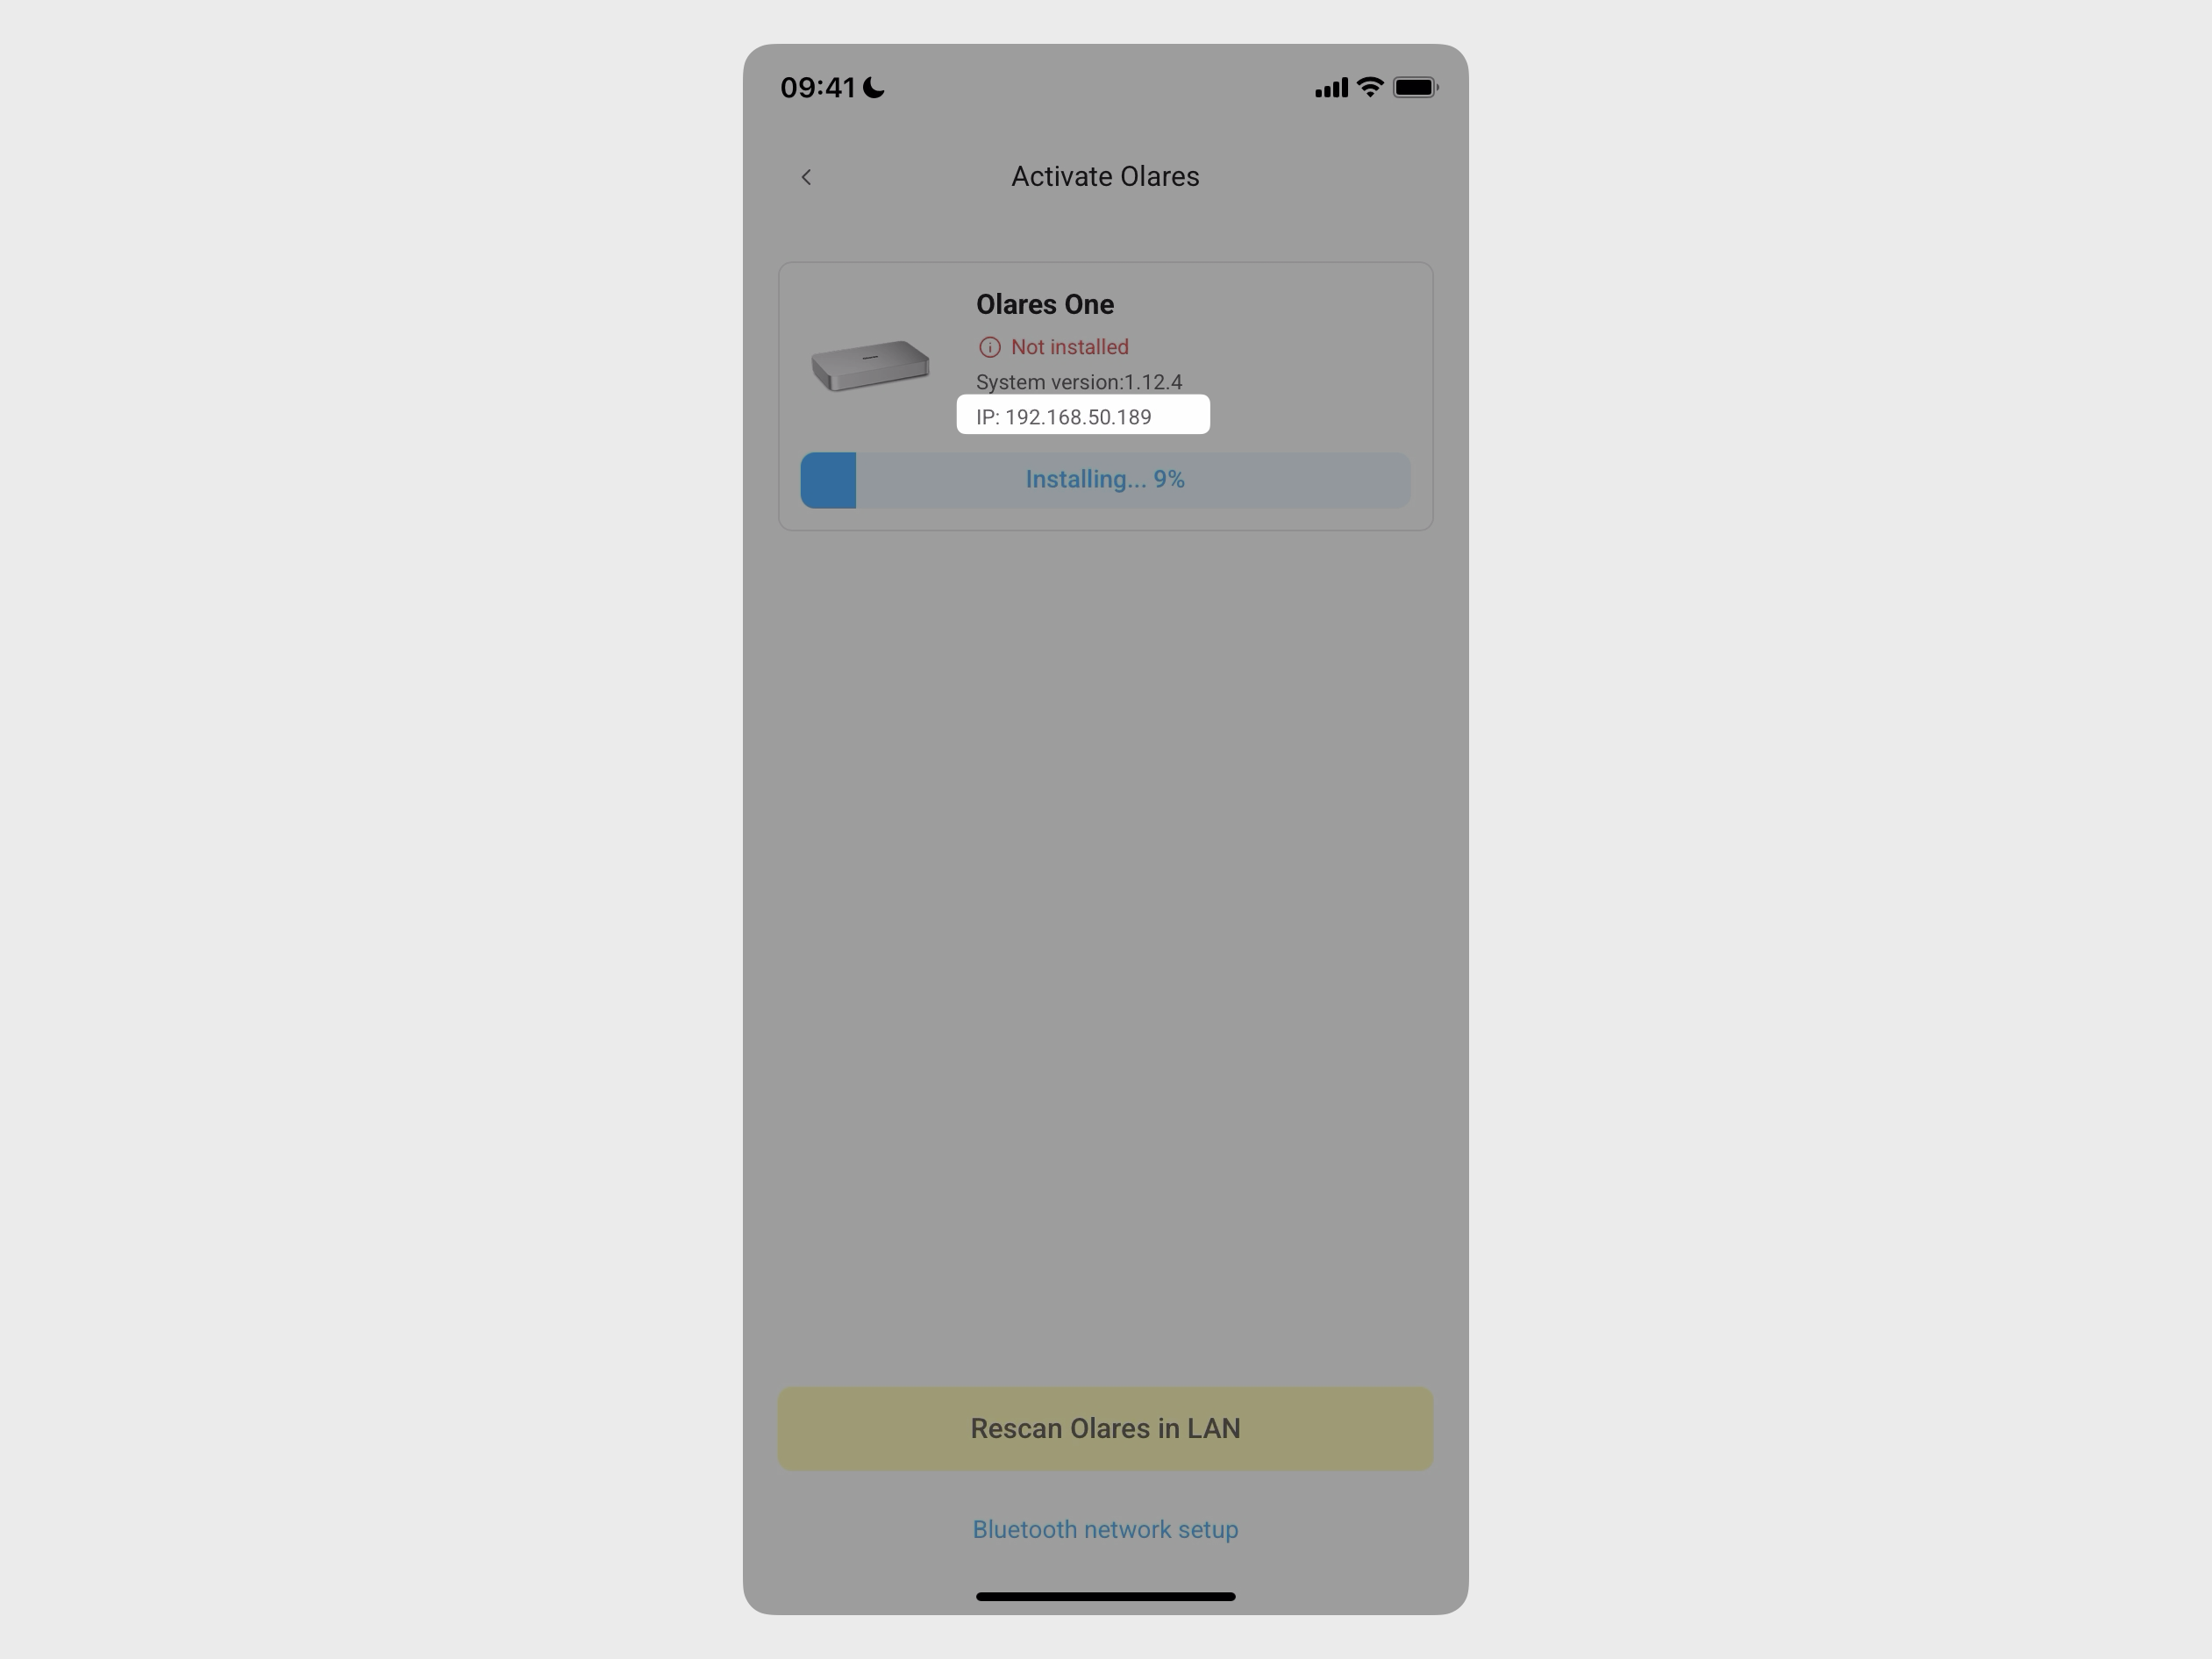
Olares One initial setup fails at 9%
Olares One fails during the initial setup process with the installation stopping at around 9% and prompting you to uninstall or reinstall.
During startup, the system performs an asynchronous NTP time synchronization before issuing security certificates. While this usually completes instantly, occasional delays can cause a certificate to be issued with a future timestamp. This is especially common if the device has not yet updated from its default shipped timezone of UTC+8, finally causing the activation to fail.
Workaround
Uninstall the incomplete installation and reactivate the device.
Step 1: Attempt SSH connection
Try this method first if you do not already have a monitor and keyboard connected to your Olares device.
Get the local IP address of Olares One from the Activate Olares page on the LarePass app.
Open a terminal on your computer.
Type the following command, replace
<local_ip_address>with the above local IP address, and then press Enter:bashssh olares@<local_ip_address>When prompted, type the default SSH password
olares, and then press Enter.If the connection is successful, skip to Step 3.
Step 2: Log in locally
When the SSH access is unavailable, log in to the device locally using a monitor and keyboard.
Connect a monitor and keyboard to your Olares One. A text-based login prompt is displayed on your screen automatically:
textolares login:Type the username
olaresand press Enter.When prompted, type the default SSH password
olares, and then press Enter.
Step 3: Run the uninstall command
Once logged in, type the following command and press Enter. This command removes all installed components and data, restoring the device to the unactivated state.
bashsudo olares-cli uninstallWait until the uninstallation is completed.
Step 4: Reinstall and activate using LarePass
Before reinstallation
To ensure accurate time synchronization, let the device remain powered on for a few minutes before reinstalling, allowing it to automatically calibrate its internal time.
Discover and link your Olares One based on your network setup.
Find your Olares One from the list of available devices, and then tap Install now on it. The installation should now proceed and complete successfully.
Thunderbolt 5 port shows as USB4 in Windows Device Manager
In a dual-boot setup with Windows 11, the Thunderbolt 5 port is displayed as "USB4(TM) Host Router" or "USB4 Root Router" in the Device Manager. This is a normal behavior and does not affect functionality.
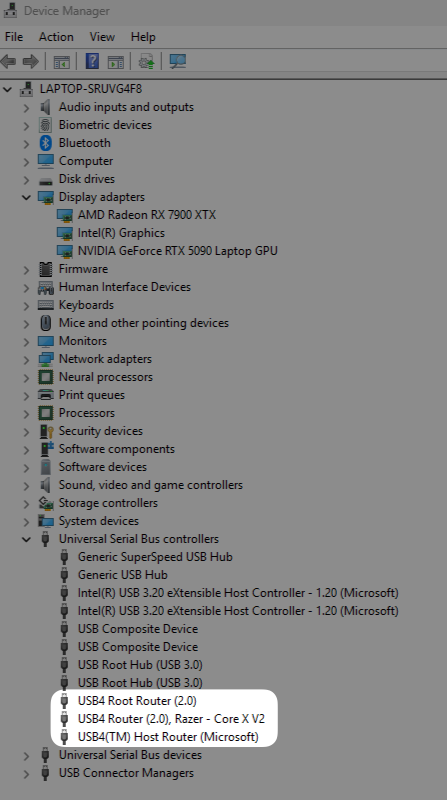
This display behavior is by design from Intel and Microsoft. Starting with Windows 11, Thunderbolt drivers are built into the operating system and managed through the Usb4HostRouter.sys driver, which handles Thunderbolt 3, 4, and 5 devices uniformly. The USB4 label in Device Manager reflects this unified architecture and does not indicate that the port is operating at a reduced speed.
When a Thunderbolt 5 device is connected, the system still negotiates the full 80 Gbps bandwidth, and Thunderbolt 5 docking stations work as expected. You can verify the connection speed by checking the Current bandwidth (down/up) field on the USB4 device properties page.
For more information, see: